With globalization, making your applications accessible to users across different regions is a top priority. Adding multi-language support to your .NET Core WPF app can significantly enhance the user experience by allowing them to interact with your software in their preferred language. In this detailed guide, we’ll explore the step-by-step process of implementing localization in a WPF application, ensuring your app is ready for a global audience.
Last week, I had a chance to work with WPF and implement the multi-language for the app. Now I want to share with all of you guys what I’ve done. So, you can use as a reference resource.
Create Helper
public static class LanguageHelper
    {
        public static void ChangeLanguage(string cultureCode)
        {
            // Get the current application's executable path
            var applicationPath = Process.GetCurrentProcess().MainModule.FileName;

            // Start a new instance of the application
            Process.Start(applicationPath);

            // Shutdown the current instance
            Application.Current.Shutdown();
        }


        public static void LoadLanguage(string selectedLang = "English")
        {
            var langCode = "en-US";

            if (selectedLang.Contains("Chinese"))
            {
                langCode = "zh-CN";
            }

            var culture = new CultureInfo(langCode);
            Thread.CurrentThread.CurrentCulture = culture;
            Thread.CurrentThread.CurrentUICulture = culture;
            ByteArrayBundleTool.Properties.Resources.Culture = culture;
        }

        public static string GetLocalizedString(string key, params object[] args)
        {
            // Get the localized string from the .resx file
            var resourceManager = Properties.Resources.ResourceManager;
            var culture = ByteArrayBundleTool.Properties.Resources.Culture;

            string localizedString = resourceManager.GetString(key, culture);

            // Format the string with the provided arguments
            return string.Format(localizedString ?? string.Empty, args);
        }
    }
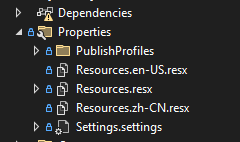
Create .resx file to implement multi-language

update App.xaml.cs
protected override async void OnStartup(StartupEventArgs e)
{
            await AppHost!.StartAsync();
            .......
            LanguageHelper.LoadLanguage("English");
            ..........
}
using in the MainWindow.xaml
<Window
   ....
    xmlns:p="clr-namespace:YourProjectNameSpace.Properties"
    ....
>
   <Label Content="{x:Static p:Resources.HelloWorld}">
</Window>
Implement change language function
Implement button call this block of code
private async void btnSaveSettingGeneral_Click(object sender, RoutedEventArgs e)
{
    LanguageHelper.ChangeLanguage("Chinese");
}
Adding multi-language support to your .NET Core WPF app opens up new opportunities to reach a diverse user base. By following the steps outlined in this guide, you’ll ensure that your app is accessible to users worldwide. If you found this article helpful, don’t forget to share it with fellow developers and subscribe for more WPF tips!
Happy coding!